What is Plastering
Plastering is a process that involves covering the rough surfaces of various elements, such as columns, beams, walls, and ceilings, with a thin coat of a type of material or plaster mortars in order to form a smooth and long-lasting surface. Plastering can also refer to the actual application of the material.
Plaster is a kind of mortar that is often made out of components such as cement, sand, and water. Plastering may be done not only on the outside surfaces of components, but also on the inside surfaces of such elements as well. Rendering refers to the application of plaster to surfaces that are applied to the outer surface. Sand faced plaster is one of the common alternative used extensively as an alternative to Smooth cast Plaster.
Plastering’s Objectives:
The following applications are the primary ones for which plastering is done:
- To shield the outside of the building from potentially damaging impacts of the environment, including precipitation, sunlight, wind, and snow.
- to bring the rough parts of constructions to a smooth finish.
- In order to enhance the look of the surface while also providing it with a decorative impact.
- In order to prevent pests from damaging the surface.
- to conceal faulty craftsmanship or substandard materials.
The following are some of the considerations that are taken into account when choosing the kind of plaster finish to use:
- Materials are easily available.
- Type of construction
- Conditions necessary for long-term use.
- Needs for high levels of both quality and durability.
- Requirements for the various kinds of finishes.
- taking budget into considerations
For each particular construction, the kinds of plaster that are used as well as the plaster finishes that are utilised are decided upon after careful consideration of the many criteria mentioned above. The cost of the various kinds of plaster and plaster finishes is another component that plays a role in the decision-making process.
If the plaster that is chosen for a construction isn’t within a reasonable price range, the overall cost of the structure might end up being much different from what was originally predicted.
In this section, we take a closer look at the various types of plaster finishes.
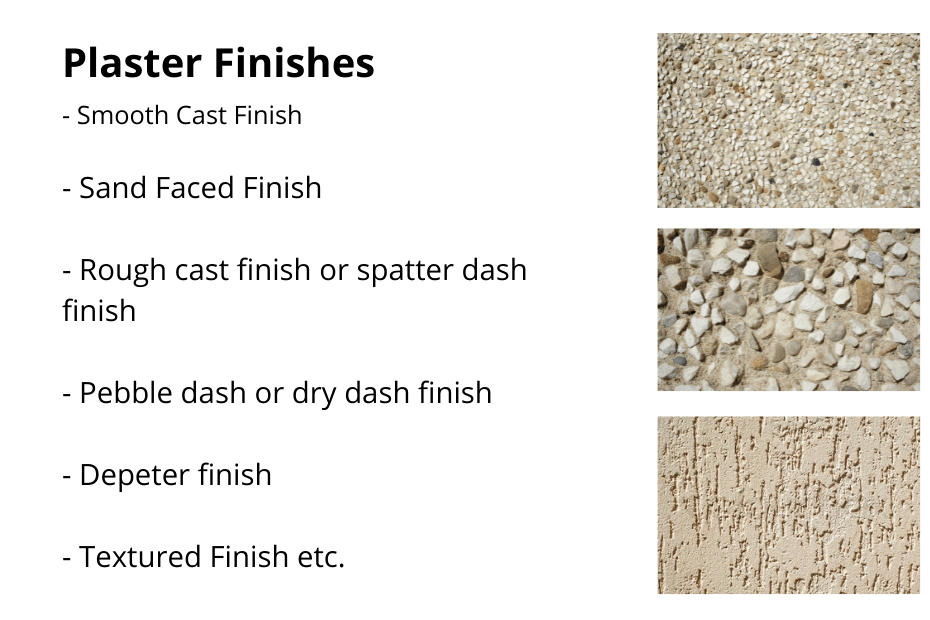
Plaster Finishes types
The construction of a building is not complete after the walls of the structure have been erected. Plaster may be used to complete your structure, which your builders can do for you if you want to adorn your walls or hide the uneven surfaces they have. Plastering is the act of covering the rough surfaces of your walls or ceilings in order to obtain a smooth and aesthetically pleasing finish. Plastering may be done inside or outside of your home.
This guide will give you how to obtain 7 various kinds of plaster finish, all of which are available. Plaster finishes come in a variety of forms. It is up to you to decide which kind of wall finish you want to employ for your project so that the finished wall will have the look that you want.
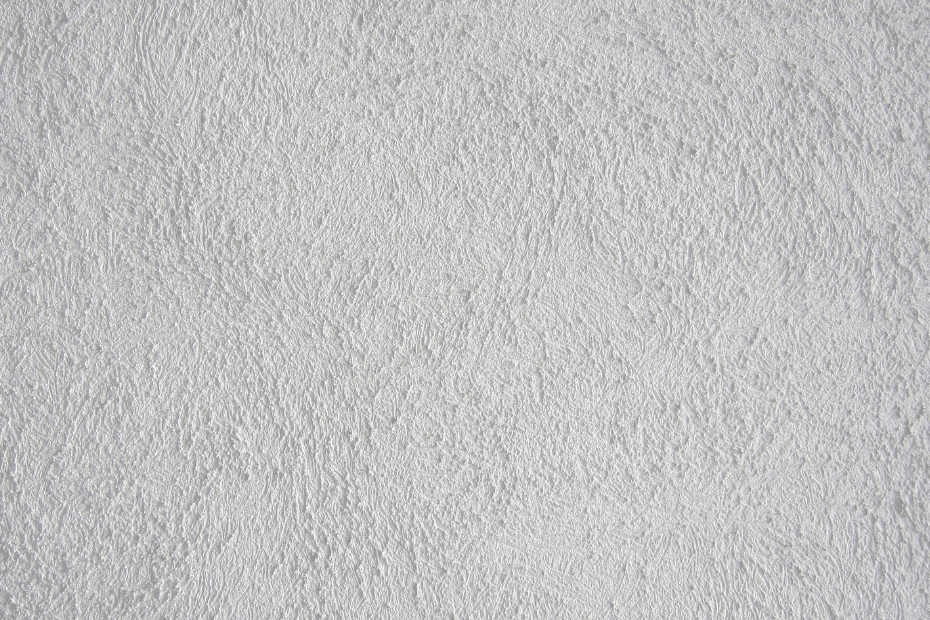
Smooth Cast Plaster Finish

A surface that is fully smooth and levelled may be achieved by using the smooth cast finish. The mortar that is used to create the smooth cast finish is formed of cement and fine sand, which are combined in a ratio of one part cement to three parts fine sand before being mixed together.
Using the wooden float, the prepared mortar is spread over the surface. Steel floats are typically not recommended for use when applying plaster to outdoor surfaces. This is because steel floats provide a very flat surface, which is more likely to break when subjected to the effects of the surrounding environment.
The mortar that is utilised should have a ratio of 1: 3 [cement: sand] in order to get a smooth cast finish. In order to produce the mortar, fine sand should be used. The skimming float or the wood float is the most effective instrument to use while spreading mortar. As a result, a surface that is smooth and level may be achieved at the end.
If you want to get a smooth finish, you should work the wet surface as little as possible and use a wooden float rather than a steel trowel.
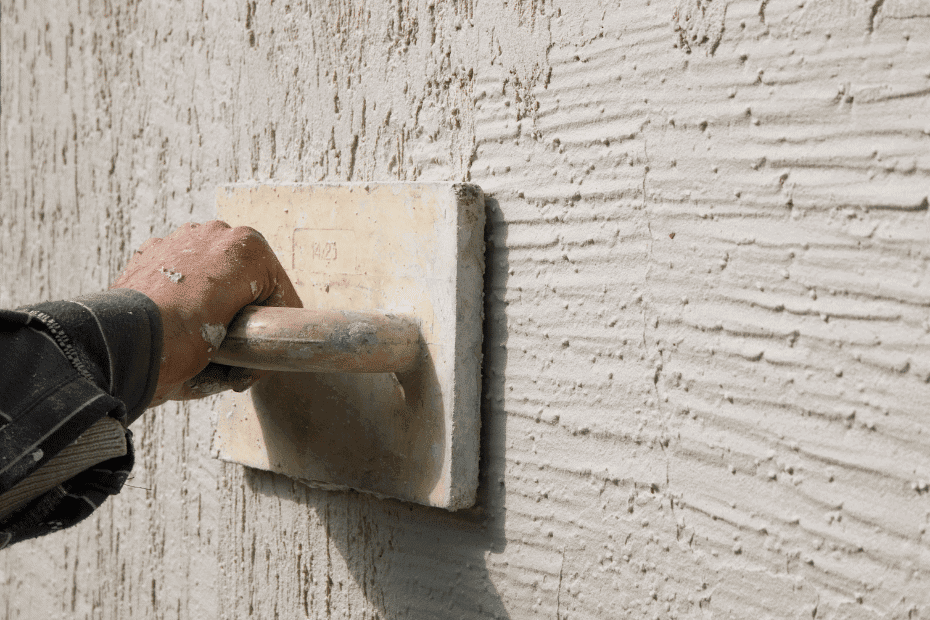
Rough Cast Plaster Finish
It is a kind of plaster finish in which the mortar is made out of coarse aggregates in addition to the standard elements that are included in conventional plaster mortar. The cement, sand, and coarse aggregates that make up the mortar in this case are combined in the proportions of 1:1.5:3, respectively.
Using a large trowel, the mortar is worked into the plastered surface by dashing it against the surface. After that, a wooden float is used in order to provide a rough finishing to the surface.
Renderings on the outside of buildings often have this kind of treatment applied to them. A form of finish known as rough cast is resistant to cracking, in addition to being waterproof and long-lasting.
Read more: False Ceiling Design
The finish known as rough cast is also sometimes referred to as the spatter dash finish. In order to achieve a rough cast finish, the mortar employed must include coarse aggregate in addition to cement and sand. The size of the coarse aggregate that is utilised might range anywhere from 3mm to 12mm. By using a trowel, a large amount of mortar is extracted, and after being pressed into the surface with the help of a wooden float, it is levelled. The use of this particular style of plaster finish is often recommended for use in exterior renderings.
Sand Faced Plaster Finish
Plastering must be applied in two coats for the desired sand faced plaster finish to be achieved. The mortar that was created for a smooth cast finish uses the same materials as this one. The first layer will have a cement-to-sand ratio of 1:4, according to the specifications. The first layer is applied at a thickness of 12 millimetres.
The first coat includes zigzag patterns across the surface. This is due to the fact that a newly put layer of mortar will not adhere to a surface that is too smooth. The initial layer is cured with water for a period of seven days.
Read more: Ferrocement: A Unique Construction Industry Solution
Next, an additional coat with a thickness of 8 millimetres is applied. In the second layer of mortar application, a ratio of one part cement to one part sand (1:1 ratio) is considered appropriate.
After that, the final layer is completed by rubbing clean, washed sand of a consistent size onto the surface of the plaster. The finished plaster will have little grains of sand on its surface as a consequence of this procedure.
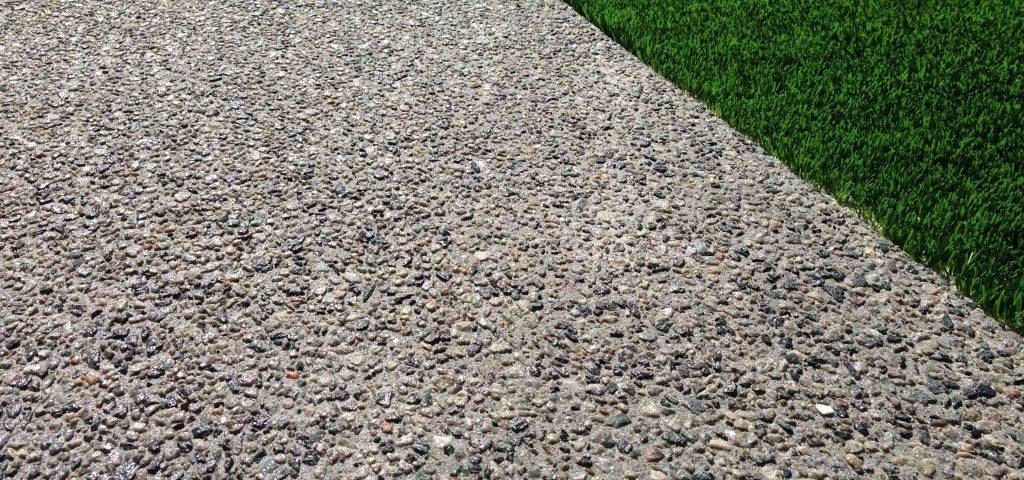
Pebble Dash plaster Finish

The final coat might be a dry dash or pebble dash finish, and it should have a thickness of 12 millimetres. The mortar has the same ratio of one part to three parts as the mortar used for the smooth cast finish.
The surface of the new plaster is raked with pebbles ranging in size from 10 to 20 millimetres. A wooden float is used to provide a mild pressing pressure to the pebbles as they are placed into the mortar. This particular sort of plaster finish is often used for aesthetic reasons.
Read more: Gypsum board: Ceiling and other applications in Construction
This is the most durable of all the finishes, and it is often free from any inadequacies or flaws. Small pebbles or crushed stone with a particle size ranging from 12.5 millimetres to 6.3 millimetres are used to create the pebble-dash finish, which results in a surface with a rough appearance. In certain cases, the pebbles or broken stones are worked into the mortar by softly pressing or tapping them.
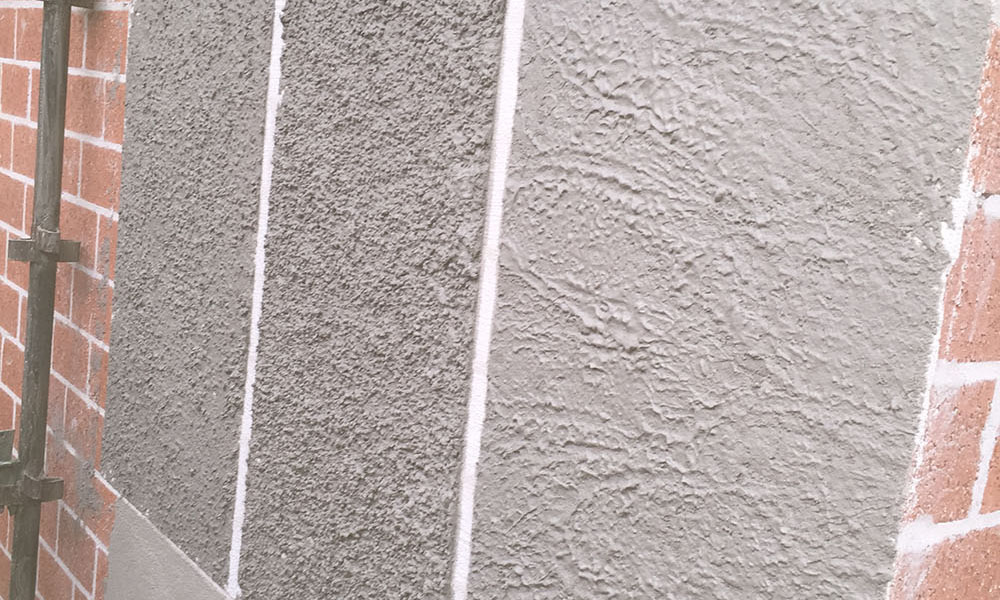
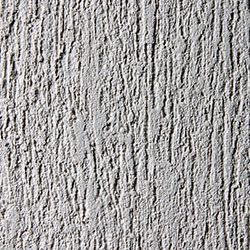
Scrapped Plaster Finish
A scraped plaster finish is often used in residential construction because it produces an attractive contrast between smooth and rough surfaces. It is a kind of plaster in which the topmost layer is scraped off using a steel straight edge or an old saw blade, or other similar equipment in order to remove the surface skin. This is done after the final coat has been smoothed and allowed to harden for a few hours.
There is a range of thickness from 6mm to 12mm for the coat of scraped finish. After the coat has been made more rigid, the surface is next scraped in a variety of designs that are 3 millimetres deep.
The plastered surface may be scraped using a variety of equipment, such as steel straight edges or old saw blades. Cracks are often less likely to appear on surfaces that have been scraped.
Depeter Finish
The pebble dash finish and the depeter finish are quite comparable to one another. After applying a layer that is 12 millimetres thick, the surface of the plaster is next textured by pressing tiny particles of gravel or flint into it with one’s fingers while the plaster is still wet.
Flints of various hues are employed, such as the pebble dash finish and the depeter finish, which are both ornamental types of plaster finishes. These finishes allow for the creation of unique and attractive designs.
Simply said, this is yet another style with a rough plaster finish.
Textured Plaster Finish
Stucco is often applied with textured finishes after it has been completed. On the surface of plaster, one may produce a variety of different textures in addition to a wide range of artistic motifs. It takes certain specialised tools and trained labourers to make the textures and patterns, and those tools are necessary in order to create them.
Neeru finish plaster
Neeru finish may refer to either the rendering process or the use of lime paste or putty to fill gaps and uneven surfaces in order to provide a smooth and level appearance. The thickness of the Neeru coat must be 3 millimetres. In order to get a Neeru finish, the proportions of the undercoat plaster must be 1:4, unless otherwise specified. Before the lime can be used as neeru, it must first be slaked at the location where it will be used and then allowed to soak in a tank of water for two days. Neeru should be applied as soon as possible after the undercoat has reached its first set (about 4 hours).
It will be worked in thoroughly with the first layer using a trowel. The surface needs to be made smooth, even, and level, and any trowel marks need to be removed. The surface must next be treated for a period of ten days. After an initial time period in which the surface is given the opportunity to evaporate any surplus moisture, the curing process may then begin. Plastering of the ceiling comes before plastering of the walls, and while plastering the walls, work must begin at the top and go downwards.
Sand Faced Plaster V/S Smooth Plaster
| Sand Faced Plaster | Smooth Cast Plaster | |
| Ingredients | Sand faced plaster is a coating of cement-sand mortar that is put over brickwork and serves as a water-resistant covering on masonry. Sand faced plaster is also known as sand plaster. In order to get the look of a sand faced finish, the second coat is applied with a sponge while the first coat is still wet. This exposes the sand grains. | The difference between sand faced finish and smooth finish plaster is that smooth finish plaster uses fine-grained sand rather than coarse-grained sand, and it is not sponged to show the sand grains as sand faced finish does. The use of plain cement or Neeru slurry in smooth plaster considerably increases the likelihood that the material would shrink. |
| Surface application | Plaster with a sand facing is often utilised for the outside surfaces of buildings. | Internal walls and ceilings are typically finished with a smooth coat of plaster. |
| Layer thickness | Sand faced plaster has a thickness of 20 millimetres, with the first layer measuring 12 millimetres and the second coat measuring 8 millimetres. | In most cases, the thickness of smooth plaster ranges from 6 to 12 millimetres. However, if the brickwork is poor and not in line or level, the variation might reach up to 20 mm or even more. |
| Flexural – Tensile Strength | Unlike smooth-faced plaster, sand-faced plaster does not have clean cement slurry applied on its surface. Sand-faced plaster has superior tensile strength and flexural strength in comparison to smooth-faced plaster, which means it is less likely to break. | On the surface of smooth plaster, a clean cement slurry is employed, which is weak in tension and flexural strength; as a result, smooth plaster is prone to breaking. |
| Non-Toxic and Anti-Fungus | In sand faced plaster, the surface of the plaster is rough; as a result, it is more likely to stay damp on the surface, which increases the potential that fungus will grow on the surface. This is in contrast to smooth plaster, which does not have this problem. | In smooth finish plaster, the surface of the plaster is smooth; as a result, there is less likelihood of dampness on the surface; as a result, there is less likelihood of fungal formation on the surface. This is in contrast to sand faced plaster, which has a rougher surface. |
| Curing | After twenty-four hours have passed since the plaster was finished, curing must also get underway. When compared to smooth plaster, sand faced plaster has a greater thickness, which means the likelihood of shrinkage is lower, resulting in a reduced need for water curing. | After the plaster has been finished drying for 24 hours, curing may begin. When compared to sand faced plaster, smooth faced plaster has a greater tendency to shrink due to the increased amount of water that is required for curing. |
| Fire Resistance | Since the surface thickness of sand faced plaster is more than that of smooth plaster, the fire resistance of the former is greater than that of the latter. Other characteristics are unchanged. | Up to 600 to 650 degrees Celsius, or 1200 degrees Fahrenheit Plaster with a smooth surface may be used as a refractory material and can protect against fire; but, with time it will become brittle, which will cause it to fracture, fall, and lose its connection with the wall. However, since smooth plaster has a thinner surface, it has a lower resistance to fire when compared to sand faced plaster. Sand faced plaster has a thicker surface. |
| Acoustic Properties | When compared with sand faced plaster, smooth plaster finishes have a thinner layer of plaster, which results in less effective sound insulation. | When compared to a smooth plaster finish, the sand faced plaster finish provides more sound insulation since it has a thicker layer of plaster on its surface. |
| Paint | The surface of the plaster used in sand faced plaster has a rough texture. When compared to smooth plaster, the surface bonding between the plaster and paint is greater due to the texture of the plaster. | The surface of this particular kind of plaster is finished to an extremely smooth consistency. When compared to sand faced plaster, bonding between the plaster and paint is weaker due to this reason. |
| Rusting | Sand faced plaster requires less inhibitors and has a lower risk of cracking as compared to smooth plaster. | When compared to sand face plaster, smooth cast plaster has a greater potential for cracking, and it requires more rust inhibitors to prevent corrosion. |
| Appearance | The surface of sand faced plaster is often given a rough texture using a sponge or a machine. The surface is rough all around, giving the home a pleasing appearance from an aesthetic standpoint. | The smooth surface of smooth plaster is achieved by applying a thick slurry of cement to the surface of the plaster. When carvings are made in freshly applied plaster, a smooth finish plaster lends an attractive appearance to the finished product. However, if there are no carvings on it, it seems to be basic and clear. |
| Mode of Applications | Sand faced plaster may be quite challenging to deal with. In comparison to smooth plaster, the finish that it produces is more textured. Sand faced plaster requires more competent workers. | Smooth plaster is simple to work with. It results in a finish that is smooth and is suitable with sand-faced plaster. |
| Finishing Time | The application of sand faced plaster requires two applications. Plaster must be allowed to dry for a minimum of twenty-four hours in between each layer applied in succession before the work can be considered complete. Therefore, sand faced plaster takes much more time to apply than smooth plaster does. | If the surface of the plaster is totally levelled, then a clean cement slurry should be put to the smooth plaster as soon as the finishing is complete. Therefore, smooth plaster requires much less time than sand faced plaster does. |
| Wastage | In comparison to smooth plaster, the application of sand faced plaster requires two coatings that are each 12 mm and 8 mm thick. As a result, the percentage of material that is wasted during the application of sand faced plaster is higher. For an area of 10 square metres, the cement consumption for a plaster that is 20 millimetres thick is two bags. For this plaster, the first coat is put in a proportion of 1:5, and the second coat is applied in a proportion of 1:3. | When compared to sand faced plaster, smooth plaster has a lower percentage of wastage during the application process since the surface is completed in just one coat, which may range in thickness from 6 to 12 millimetres. When using a plaster that is 12 millimetres thick, the cement consumption for a 10 square metre area is 1.8 bags when using a 1:2 proportion, 1.2 bags when using a 1:4 proportion, and 0.9 bags when using a 1:6 proportion. |
| Application Cost | When applied to an outside surface, sand faced plaster is typically applied in two applications. As a result, there is a greater amount of wasted material. The price of sand faced plaster is higher when calculated per square foot. Because of this, the overall price of sand faced plaster is higher than the price of smooth plaster. | When used as interior plaster, smooth plaster is applied in a single coat. Therefore, a smaller amount of material is utilised, and there is also a less amount of material wasted in this plaster. The price of this plaster is considerably lower when measured in square feet. As a result, the overall cost of smooth plaster is much lower than that of sand faced plaster. |
| Dampness | Sand faced plaster is often applied in two layers, and the surface of the finished product has a rough texture. Therefore, the impact of the water on this plaster is greater. Because of this, sand faced plaster requires less water proofing than smooth plaster does. | A single application is used to achieve the smooth plaster finish, and the surface of the smooth plaster itself is equally smooth. As a result, water has less of an influence on this plaster. Because of this, smooth plaster requires a more amount of water proofing than sand faced plaster does. |
| Strength | There is no usage of neeru cement slurry in the production of sand faced plaster. | The difference between sand faced finish and smooth finish plaster is that smooth finish plaster uses fine-grained sand rather than coarse-grained sand, and it is not sponged to show the sand grains as sand faced finish does. The use of plain cement or Neeru slurry in smooth plaster significantly increases the likelihood that the material would shrink. |
| Environmental Effect | Because it is exposed to the elements, including heat, wetness, and humidity, in the open areas. It had a strong influence. Therefore, there are more than two coatings applied. | As this is done on indoor surfaces, the impacts of the environment, such as dampness, heat, humidity, and rain, are reduced; thus, just one coat is applied. |